


I finished sewing the binding and label on a new quilt this morning …. ugh, I truly despise this part of the quilt making process … even more than binding. And of course, it didn’t help that I waited until the absolute LAST minute to do it.
I designed this quilt, hmmm, probably close to 2 years ago. I knew I wanted to call it something with “Tiki” in it, because it reminded me of that as soon as I finished making the top, and saw it as a whole (not sure why, but it did, lol).


I figured I would come up with exactly what the name would be later. Not far into the process of making the quilt, I realized the quilt kind of named itself, lol … it truly was one dilemma after another as I made the quilt, so … the quilt name became “Tiki Dilemma”. I thought I would share exactly what a couple of those dilemmas were that I ran into as I worked.
It started right from the get go, when I was ready to start piecing the quilt. From the picture below, you can see that the quilt was intended to be made with only piecing. But, I was going to a quilt retreat, and my mission for the trip was to totally piece 4 projects (and I did), but, the problem came a few days before I left for the reteat, when I sat down to figure out the piecing so I could cut everything out before I went. Well … math is NOT my thing, so trying to figure out the piecing just drives me crazy. Anyway, after looking at the quilt design for awhile, and being totally baffled by how difficult it looked like it was going to be, I realized that it would be ALOT easier if I just appliqued the big orange shapes.

So I very quickly made a huge applique template, and got to work cutting my washaway applique shapes. I actually love it so much more, because the fact that those shapes are appliqued adds to the illusion that the shapes are the foremost shapes on the quilt (because now they are :).

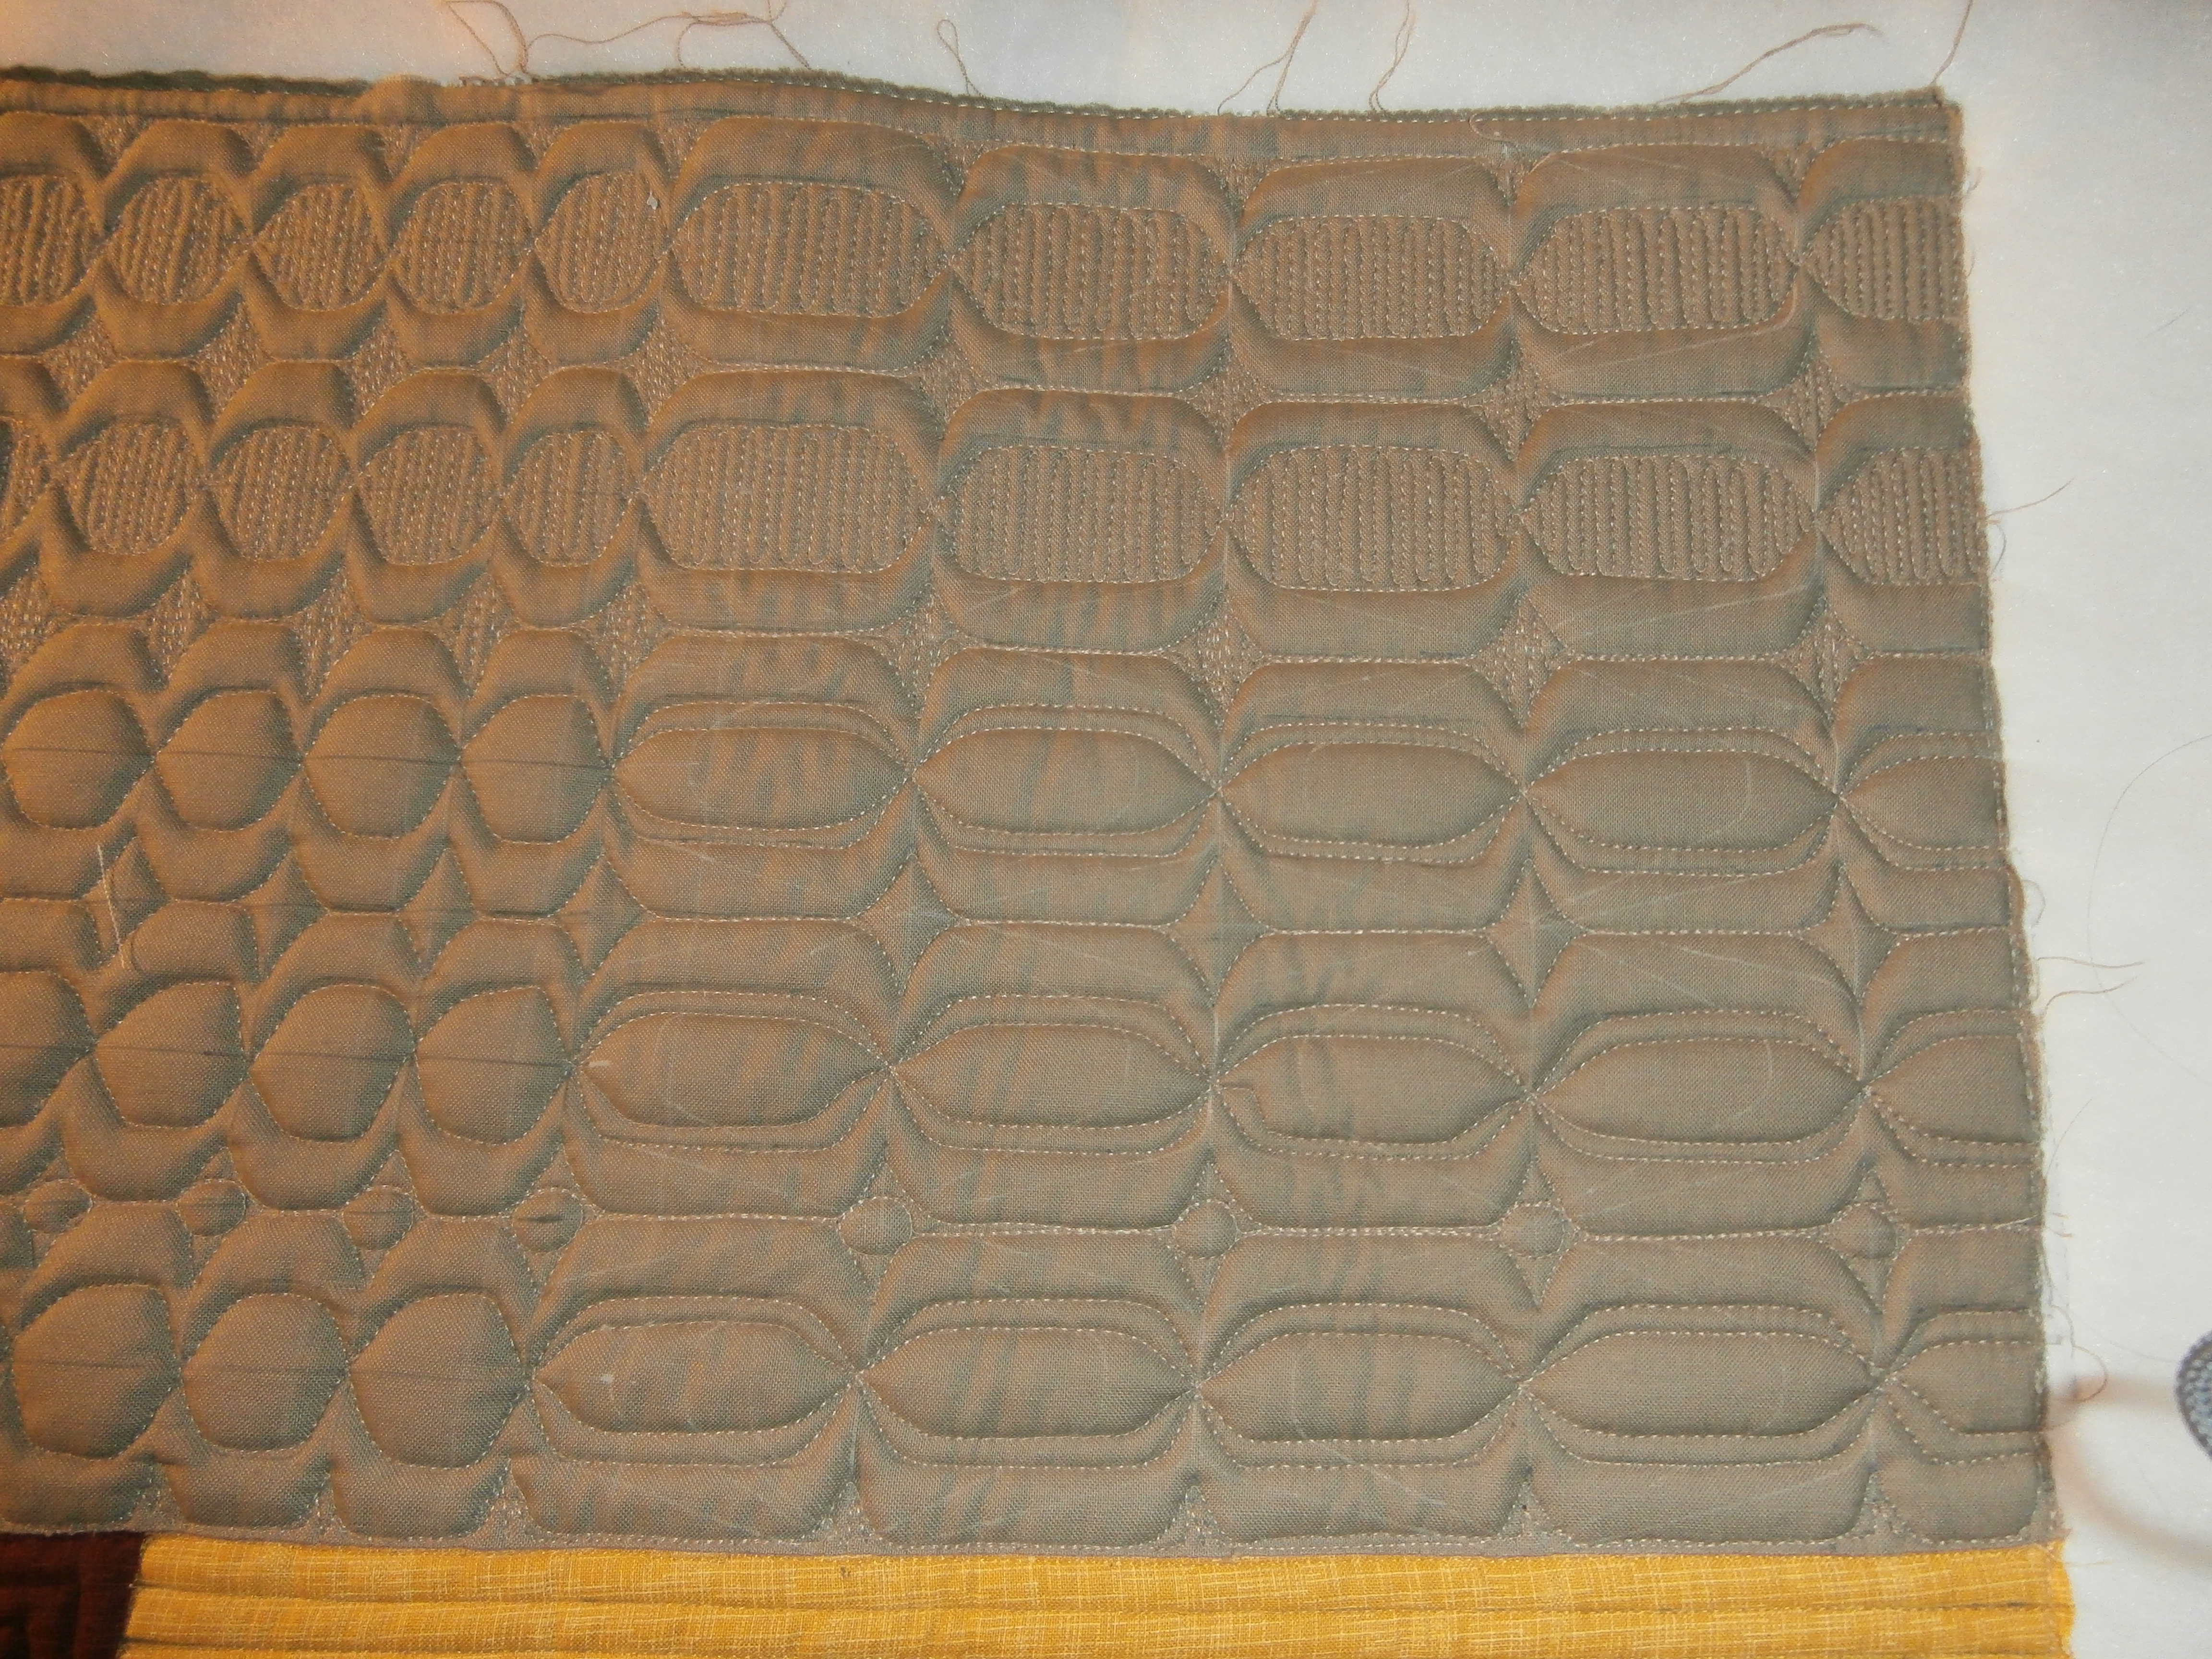
My next dilemma came when I ready (yes, almost two years later) to come up with a quilting plan, and quilt it. It really wasn’t difficult to come up with a quilting plan, I knew basically what I wanted to do. In order to show depth, I wanted the tan background to have the tightest quilting, then the yellow “poles” would have a medium density quilting, and finally the orange appliques would have the least quilting on them. So, I doodled a little on a printout of the quilt, and came up with my plan. I did not want this quilt to be “quilted to death”, the scale of the elements in the quilt were SO large that it really needed to have similarly scaled quilting designs (not that I’m any kind of expert on design, but to my eye, that was what it needed). My next step was to make a small sample piece with some of the elements to try out the designs I had in mind to see how they would behave on the quilt. I found that some designs did work, and some just didn’t. You can see from the pic of my samples below, that the quilting I had planned for the yellow strips (I wanted to do straight lines in different distances apart to give the illusion of the “poles” being rounded) just didn’t work, the lines on the outside edges of the yellow were too close together and distorted the piecing. I also found that the design I originally planned to do in the maroon squares was too close together and also caused distortion. I used the actual batting combination I planned to use, and boy am I glad I did, because my sample showed me that I needed to change my batting choice too …way to puffy, it was causing puckers in the background quilting. So, I came up with the changes for the quilting problems, and I actually like them better now …. they are much cleaner, and minimal, and actually work better with the quilt. The background quilting is simply a tiny copy of the applique shape. I decided to do them smaller behind the orange applique, and then elongate them as they moved away from the orange so the eye was drawn into the shapes. So, I marked each and every one those little shapes on the entire background, I used a frixion marking pen that irons off, but I washed the quilt to get rid of the markings. I was impressed that I was able to mark the entire quilt with one marking pen, and only had to use a new one for the last few shapes I marked. I used permacore thread (from Signature) for all of the quilting. I really like to see the thread, yes, even in the background quilting, I like the added textural dimension. I used two layers of batting, Legacy EcoBlend on the bottom, and Legacy poly on top (since my original batting choices just didn’t work). I quilted it, with no problems, took it off, and that is when my next dilemma started …….
I kept looking at it, and looking at it, and was simply TORN! I was absolutely thrilled with the quilt as a whole, it was exactly as I envisioned it. BUT, that is when my over-thinking began. I have entered a lot of quilts in shows, but, the majority of them are machine quilting based shows, which I know means they kind of need to be quilted to death, lol. The quilting is where the emphasis of the judging is placed. But, I really did not envision that kind of quilting for this quilt, and it really (to me) just does not GO with the design of this quilt. I kept over thinking, and back on the machine my little sample went, to see what options I could come up with ………. as you can see from the sample pics, I played with filling between the shapes, adding circles, etc., and then filling.


Well, some of the options looked good, but just not for this quilt, the scale of the piecing/applique just didn’t support that tight of a quilting design. So, I asked the expert, lol, my son Josh (the architect/designer) …. he is just so wise :)! He couldn’t understand what the dilemma was ………… he told me “Mom, you have to stay true to your original design, don’t change it to fit what you think somebody else wants to see”. And so, I did! Thanks Josh! I REALLY like this quilt ….. and I do plan to try entering it in some shows, so I can share it with other quilters, but I also want to get some feedback from judges comment sheets.
Sorry if that was a little rambling, lol …………………….. I haven’t had a lot of time for computer stuff, and have been trying to finish this post for a really long time (obviously, I didn’t just finish binding it today, it has been bound for a while, and is now in Texas to be hung at Quiltcon). So, if you are at Quiltcon, and have a chance to see it in person, I’d love to hear (now knowing my “dilemma”) what you think …………………

very nice Jodie, I have felt very drawn to do one of these modern quilts and this inspires me!
Good advice from your son – you have to live with the quilt, the judges see it for a few minutes. Always make them to please you, not the judges. Who says show quilts need to be quilted to death? If it’s a good quilt, it will catch the eye. I am always surprised when any of my quilts win ribbons because I only make them for me. I enter them in shows just because I like them and want to show them to others.
I’ve always been drawn to your quilts and find them inspiring.
Thanks Helen!
I love it! Thanks for sharing your process.
Since it will be hanging in QuiltCon, that confirms your son’s advice! And the value of testing quilt design on the SAME fabric and batting.
Awesome. You are an inspiration!
I think it is really helpful to know how long it takes to put such a quilt together. I think so many of us expect to produce beautiful things just like that – but its great to see your process and learn it takes even the pros a long time! I love the quilting. Really gorgeous.
I always like to hear the “quilt story” and you, as usual, are very good at putting your process into words. I want you to know you inspire me to try new things and sometimes I find the time to do it. But I want you to know, whether you think you rambled too much or not, what I took away from your post is something I have never done…I will make a sample of my quilt sandwich to try out my design choices (DUH) because I have been disappointed in what I have tried on some special projects and i have abandoned them. THANK YOU!
I’m glad you got something from it Janice, lol. I made some bad choices on quite a few quilts too, which is when I realized it was well worth my time to make a little sample before I start, to save myself time in the end:)
Thank You for sharing your thoughts. I am an over-thinker and can relate to your tossing and turning throughout the entire process.
And BTW, I love the quilting!!
I did see your quilt at QuiltCon 2015 and loved it. Even have a close up picture of the quilting on my camera. I was inspired by the movement each design gave to your quilt.
Thanks Marty! Glad you liked it!