Wow, it has been quite some time since I’ve blogged … I have been busy! I started this post weeks ago, I just never got back to it. But, last week after working on some new class samples, and getting to truly do the kind of quilting I wanted to do with my new machine, I just had to post about it! My mind is absolutely blown by the precision and accuracy I can now achieve. I mean seriously, I had no idea how hard I was working before, lol. I am absolutely in LOVE! If you know me, or have taken a class from me, then you know that I had a really old (from the first year Gammill made the Premier) Gammill Premier. I did not have a stitch regulator, or needle up/down button, yep, just the on/off button and the hand wheel, lol. Now, don’t get me wrong, I don’t think you NEED a stitch regulator, heck, I’ve been quilting without one for over 20 years. Learning to regulate the stitches is easy, it just takes a little time to get used to. I truly believe that new quilters should practice stitching without the regulator, it really teaches you how to get a nice flow to your free motion quilting.
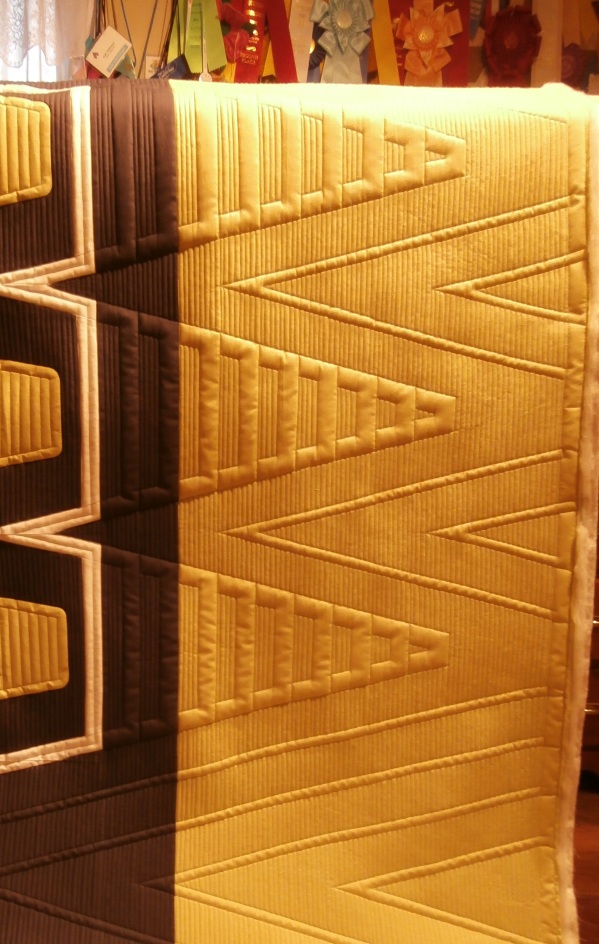
Over the past few years, the style of quilting I want to do on my quilts has changed, and the designs I want to use are straight lines, and ruler work. This was when I realized that as much as I hated to admit it, lol, I really needed to have a stitch regulator. It isn’t that I couldn’t do the ruler/line work without it …. I did ….it just wasn’t practical or enjoyable to do a whole quilt full of it. This quilt, was the turning point so to speak ….
When I did this quilt, I made a smaller version first to play around with my quilting ideas, and boy, that was a real eye opener. Normally, I did most of my straight lines without a ruler (if they were oriented vertically or horizontally of course, which they always were, because that was what I knew I could do), but obviously, I wanted it to to be really nice, so I needed to use a ruler. Well … I started the practice one using a ruler, but VERY quickly realized there was NO WAY I was going to be able to do it. For anyone who has not done ruler work on an un-regulated machine … it is a pain (which is fine if there isn’t a lot, but this quilt was almost all lines), so I stitch one line, hit the stop button, then there is the 50/50 chance the the needle stopped down, if it stopped up, then I had to turn the hand wheel to put the needle down, then re-position the ruler, hit start again, and in some cases on this quilt stitch about 3 inches, hit the stop button again continue this for the entire quilt. Not far into the practice quilt I realized that I would never finish if I did it this way, and finished without the ruler. So then I agonized about doing the real quilt … I really thought I needed to rethink my quilting designs, because I was never going to make it through the bigger one. But, the more I thought about it, this was the way I wanted to quilt it, and so I did, but without the ruler. No, the lines are not all perfect, but the overall effect is exactly how I wanted it. After this quilt, I knew I needed to have a regulated machine if I was going to be able to do the quilting that I wanted to do.
The next big decision for a new machine was the size … do I stay at the 18″ or go a little bigger. I ultimately decided to go with the 22″, since I was doing so much line work, I really wanted to gain some more space. I loved the small size and light weight of my 18″, but I had played with the 22″ in Paducah last year, and couldn’t even tell the difference in weight, the new machines move so much smoother. Next was table size, well, that was an easy one … I had a 12 ft. table, and because I quilted in a small bedroom, in order to fit, I had to take the closet doors off, and one end of the machine was in the closet. This time, I was going to a 10 ft., now it can fit better, and even better, I can no longer quilt those monster size quilts people like to make (and that I hate to quilt), LOL!
My husband suggested that I should swap the quilting room (downstairs) with our bedroom (which was upstairs). This really made a lot of sense, since I had taken over my son’s room upstairs, for my sewing room when he moved to Denver. Yes, it was a great idea, because the bedroom was bigger, and then the whole upstairs would be my quilting studio. You know when you think about doing something, and in your head it seems easy enough ? ……….until you start doing it! Well, this was one of those things. I had called my Gammill Dealer Doug Creasy at A Touch of Thread and set up the deliver for one week later. It wasn’t long before I realized how much work, it was going to be, it was a major undertaking. I guess I didn’t think about where you put all the stuff from one room, so you can put the other stuff in there …. so it was just EVERYWHERE. And it certainly didn’t help that we live in a house that is over 150 years old, and the stairs are almost as steep as a ladder, and very narrow.
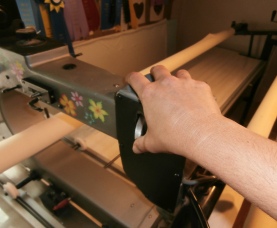
The first job was to disassemble the old machine. It was so strange how sad I felt taking it apart, especially when I looked at this …I mean really, my hand print is worn into this machine, that represents A LOT of hand wheel turning in the past 15+ years, lol.
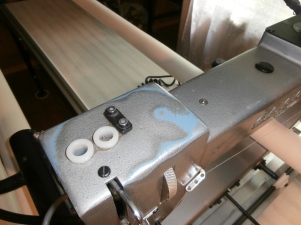
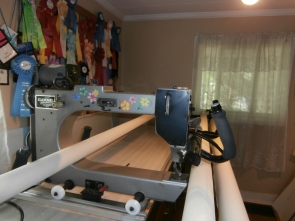
It came apart really quick ….

It took every bit of the week I had, to do the swap, and get new carpet in the room where the new machine would go. But we got it done! Luckily, my husband was able to take a day off work for the delivery. I have to thank Doug, he is the best! I felt bad, because we had to take all of the long parts of the table, and the rollers in through the upstairs window. I couldn’t get pictures because I had to help, lol. Doug took them up the ladder to my husband on the porch roof, and then he passed them through the window to me. And of course the leveling took a bit of work too, because the floors are really uneven, but Doug worked until it was just perfect!
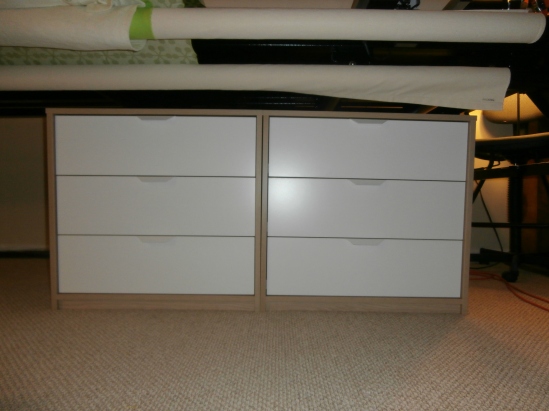
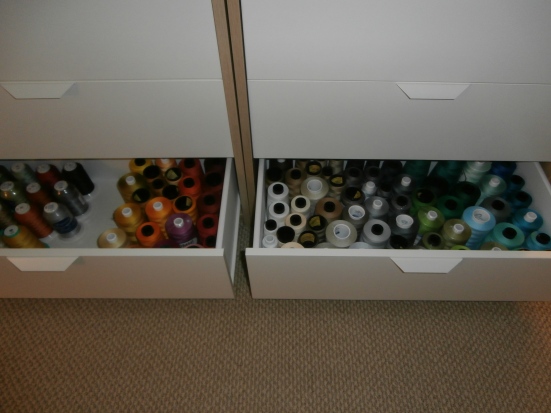
Once the machine was here, it actually took me close to two more weeks to totally finish with the room swap/setup. I found some drawers at IKEA (they are called ASKVOLL) for my thread, and they fit perfectly under the machine table, and hold a lot of thread.
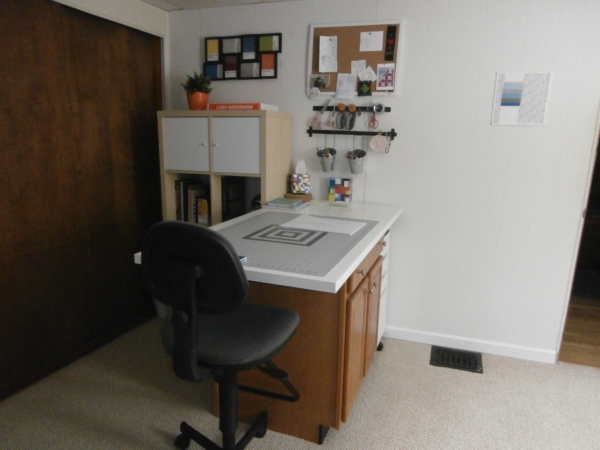
I bought a new table top to add to my cutting table, some Ikea storage units, and added shelves to the closets. I am so happy to finally have a place for everything, and even though the room itself isn’t that big, it is so nice to have one room for quilting, and one room for sewing (all on one floor). I am still trying to figure out the lighting for in here. There are no overhead lights, and this room is basically like a cave. Our house it totally surrounded by trees, so in the winter when the leaves are gone I may have a little outside light.


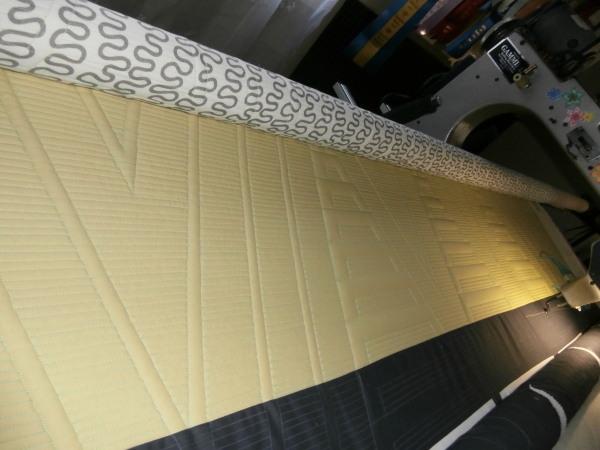
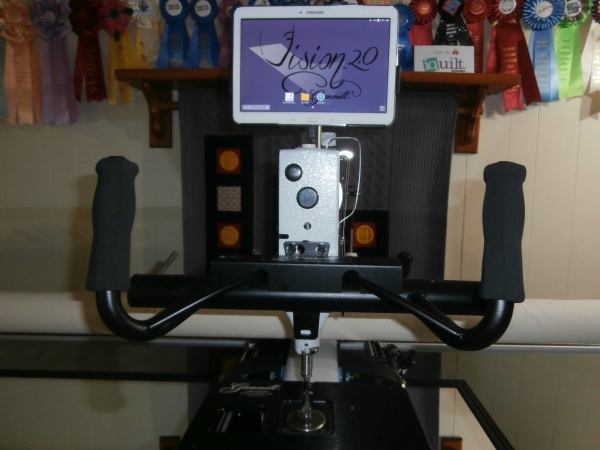
Once the room was organized, I needed to get back to quilting, because I got really behind on customer quilts after not quilting for a few weeks. I was a little worried that there might be a bit of a learning curve, but …. nope, not at all. I don’t know why I was really worried, I had used these machines a lot in classrooms. I did have some issues the first couple of weeks, but they were all ME not being able to retrain my brain quick enough, lol. I don’t know how many times I hit my hand into the tablet, because I kept automatically reaching for the hand wheel. And I also had “think” each time to advance the quilt, because the table configuration is different. After about a week, I finally got it figured out, and quit hurting myself, lol. I got comfortable with the machine doing non stop customer quilts, and this past week was the first chance I really got to quilt some things that “I” wanted to quilt. And yeah, I seriously can’t even believe how much more precision and accuracy I have now! It is mind blowing to me how much smoother this machine moves, and the beauty of being able to just “pause” for a second, or slow down in a certain area with the stitch regulator on. I almost feel like I’m cheating :))). I will say, I still prefer to do free motion stuff with out the regulator. It did take me a bit to try to figure out what stitch length to set the machine at. I quilted using different lengths, and then compared it to stuff I had done on the old machine to figure out which size it matched (it ended up being about 13/14 spi). I am so anxious to quilt some stuff of my own!!!
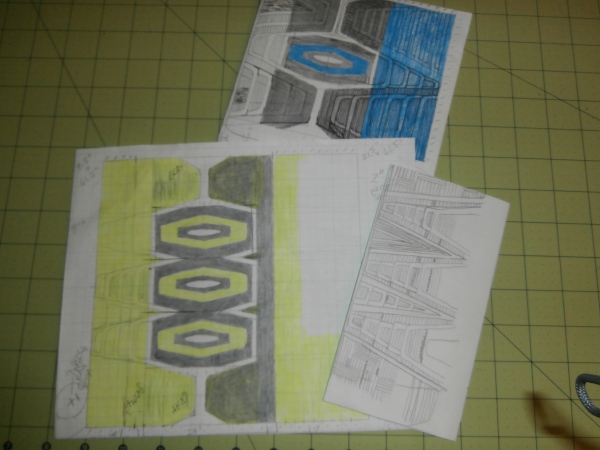
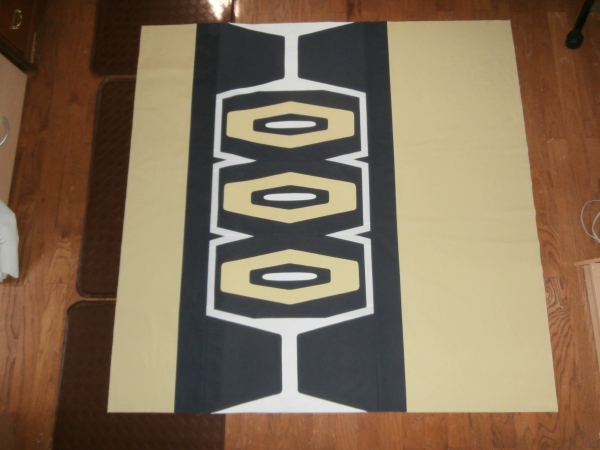
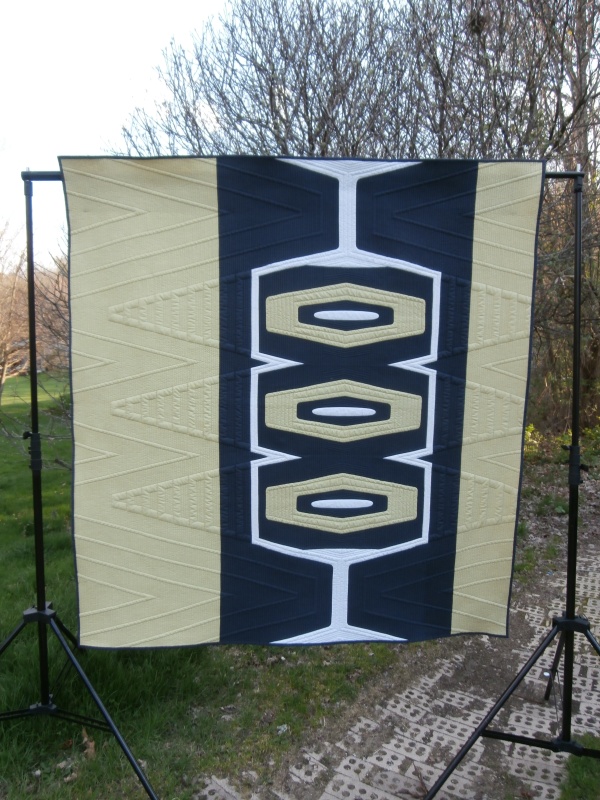
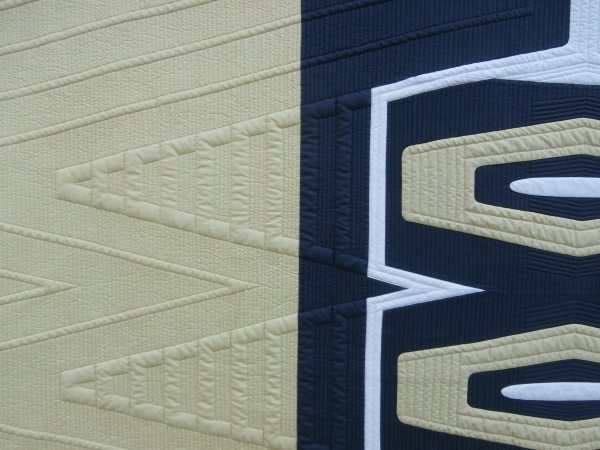
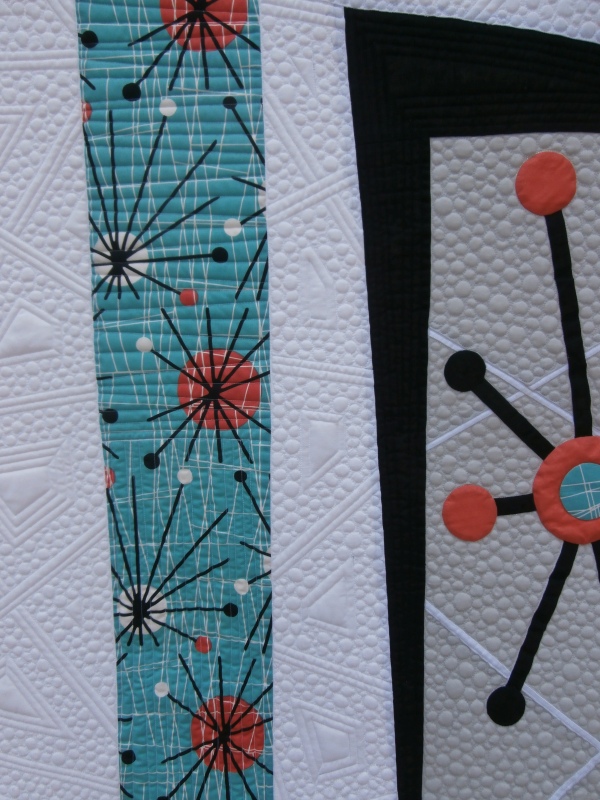
Sorry, that got a little long and rambling … if you are still with me, I feel like I need to at least post some quilt pics after all of that! I had shared pics of this quilt in process here and here. This year, I decided to start quilting some things that I already have before I start making anything new. Before I quilted “Atomic”, I decided to add some white to the sides to make it bigger. I was totally shocked when this won 1st in the Modern Category at MQS this spring.

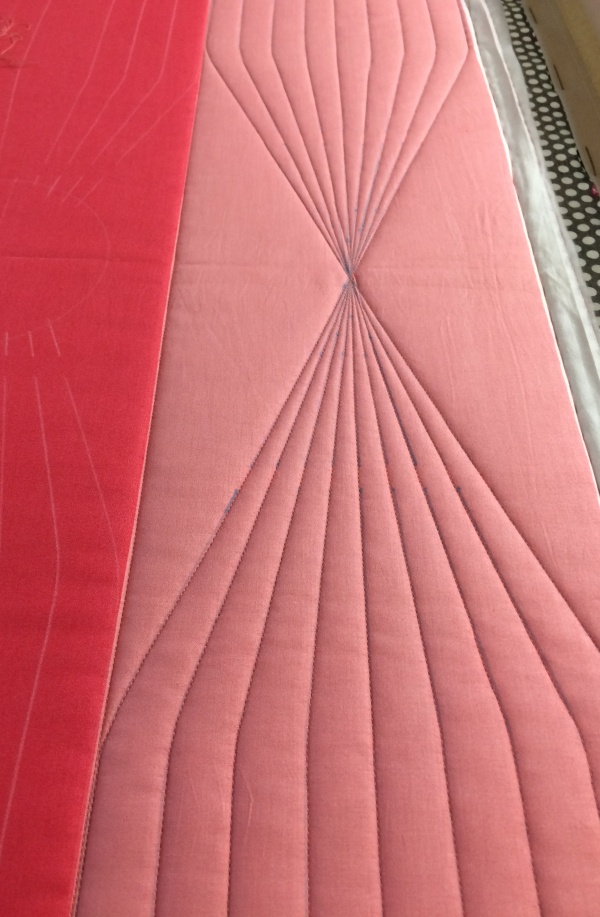
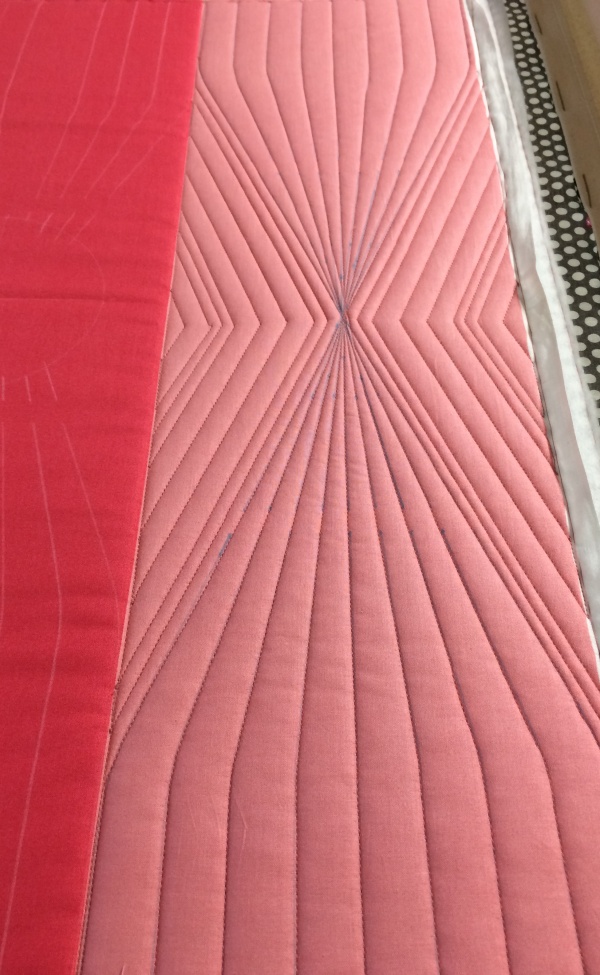
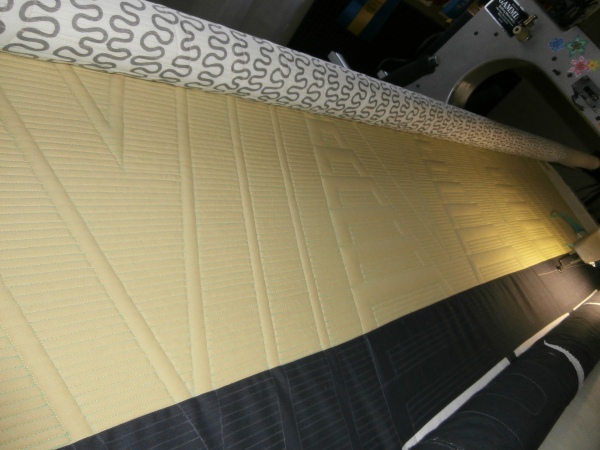
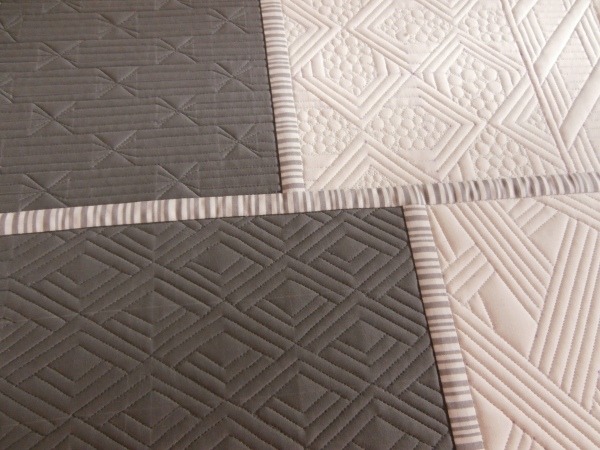
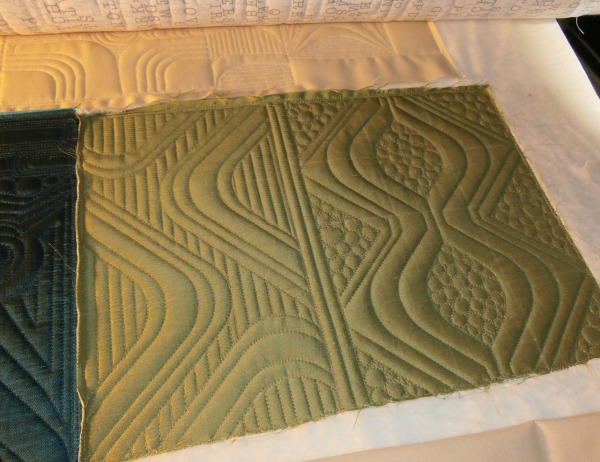
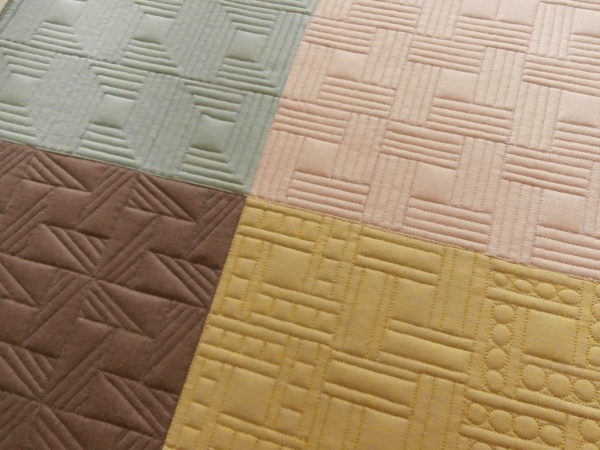
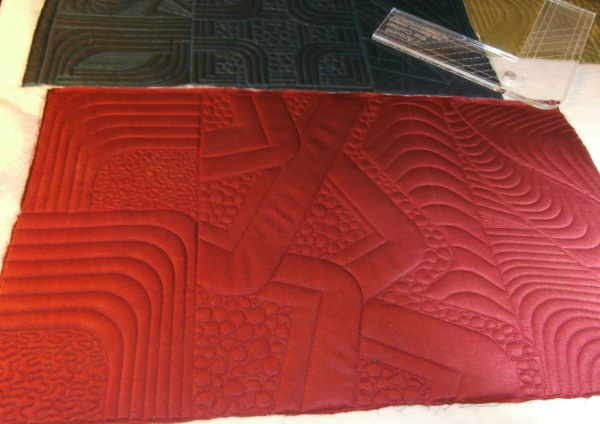
And last but not least, these are a few of the new class samples and samples to show how my new rulers and stencils can be used, that I mentioned in the beginning of this post!
Happy quilting!!

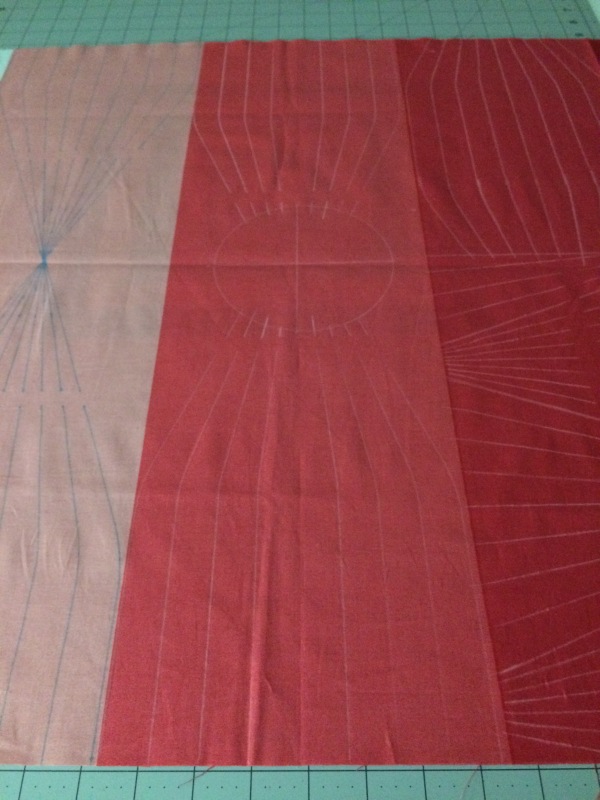
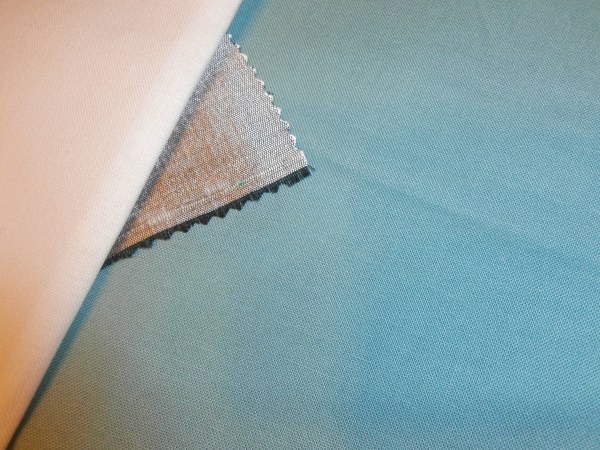
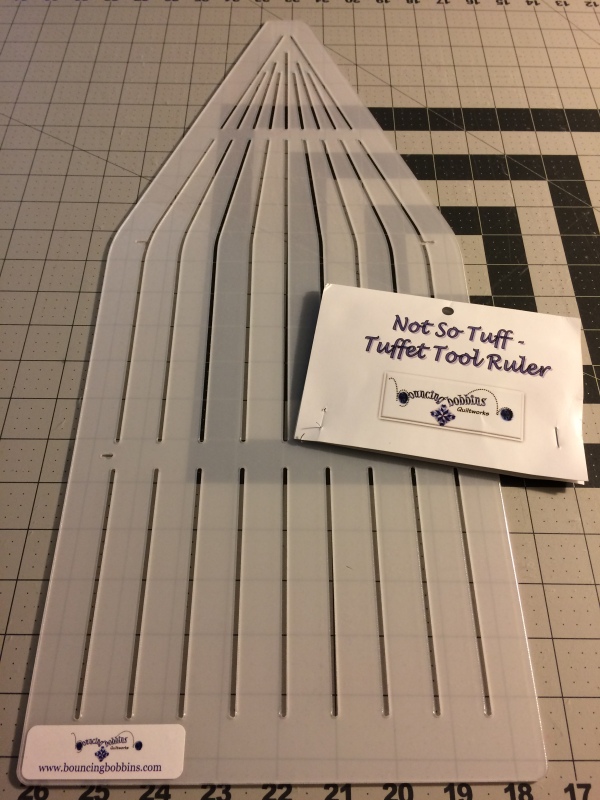 I had no idea what it was for, but I knew exactly what I wanted it for … marking quilting designs of course, lol. When I clicked on it, I discovered it is for making Tuffets. It is called the Not So Tuff – Tuffet Tool Ruler by Bouncing Bobbins Quiltworks. There is nothing I love better than a tool that can be used for multiple things! I decided to order one, hoping it would work for what I wanted to do with it. When the ruler arrived, I was MORE that happy, it is thin plastic (for marking), and it WAS going to work just as I hoped. So, I grabbed some fabric and started to play. I marked a few basic things on fabric, and as I marked the first few designs, I could not stop thinking of more and more designs that I could mark with it.